How to Create Promotions
To create a new promotion, click on new promotions on the top right of the promotions page.
4 fields will be displayed to you initially. The promotion type field will determine the other form fields required to create the promotion.
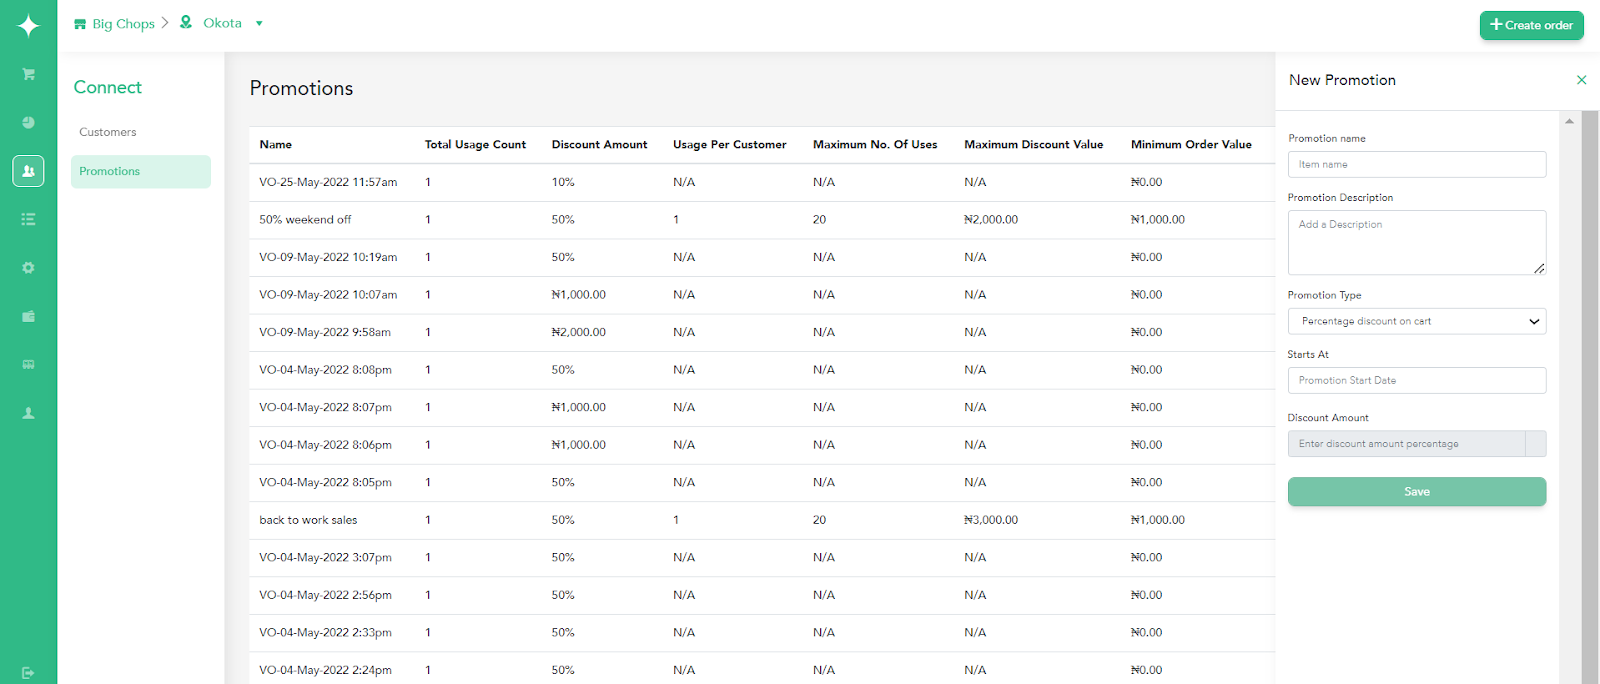
Promotions Name- The name the vendor uses to identify each promotion.
Description - This will help other users understand the promotion. Note: This field is not required.
Promotion Type - This is the type of promotion you want to create which can be any of these; Percentage Discount on Cart, Fixed Amount on Cart, or Percentage discount on delivery.
Starts At - The date the promotion begins
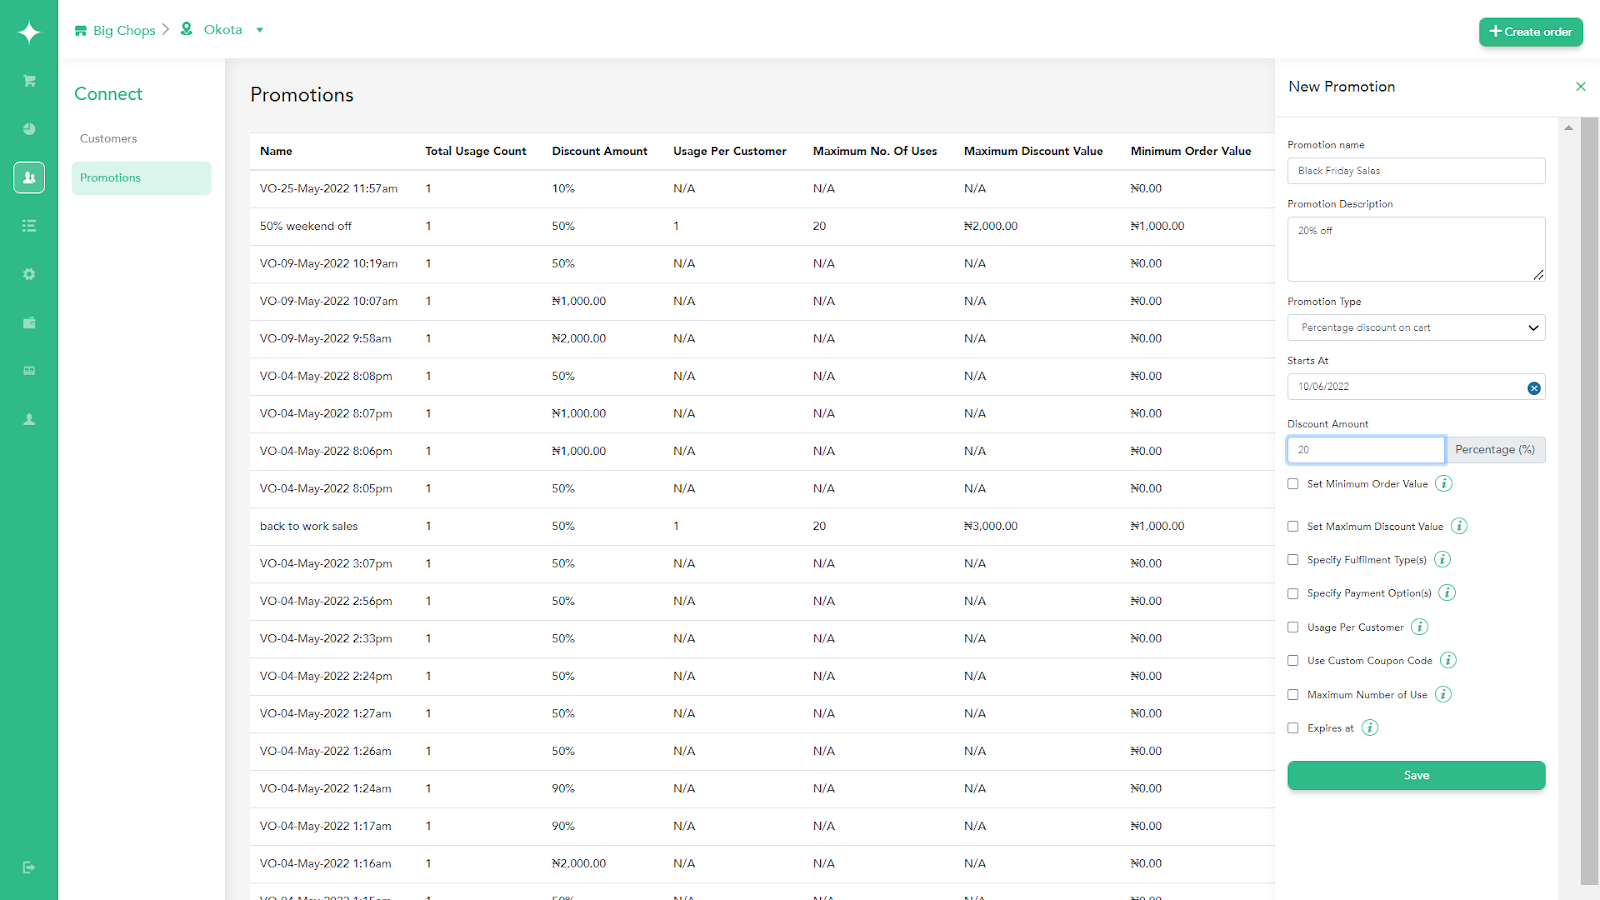
Other form fields required to create a promotion include:
Set Minimum Order Value - When this checkbox is selected, you get to determine the minimum value a cart must have before the customer can participate in the promotion. Leaving this field unchecked means the coupon can be used on any order value.
Set Maximum Discount Value -This is used to set the maximum amount that can be deducted as discount. For example, 10% Percentage Discount on Cart, maximum deduction allowed NGN 2000.
Specify Fulfillment type - This speaks to discounts based on how an order is fulfilled. When this checkbox is selected, a dropdown is displayed with all the fulfillment options based on what has been selected in settings (Delivery, Pickup, or Dine-In). The vendor can select one or more fulfillment options for a coupon. Coupons can only be applied to the selected fulfillment option when this checkbox is selected
Specify Payment Option - When the payment option field is selected, the vendor is shown a dropdown based on what has been selected in settings. The vendor can select more than one payment option for a coupon. Coupons can only be applied to the selected payment option when this checkbox is selected
Usage Per Customer - This field allows the vendor to set the number of times a coupon can be used per customer. Tick the checkbox to fill the number limit.
Use Coupon Code - This allows the vendor to create their own unique code i.e Detty December. This code will be used by customers to access the discount. Tick the check box to fill in the unique code.
Maximum Number of Use - This limits the number of times a coupon can be used. Once the available number of times is used up, the Promotion is disabled automatically. For example, creating a promotion for your first 20 customers.
Expires at - This is when the promotion should end. When a promotion has expired, the coupon code cannot be used. If this checkbox is not selected, the coupon remains available in perpetuity.
Save
Related Articles
What types of promotions can I create?
On Orda, you can create three types of promotions: Percentage Discount on Cart - This promotion type allows a certain percentage value to be deducted from a customer’s Order. Mr James orders items worth 1500, with a percentage discount of 10%. This ...How to Apply Promotions on Microsite and WebPos
Promotions On WebPOS Promotions on WebPos are applied on cart when the ‘Apply Discount’ button is clicked. The options comes in 2 forms which include: Promotions - This option permits you to choose from existing promotions created. To apply ...How to Create Tables
Before a user can successfully assign tables to a dine-in order, the user must have created tables on the backend. Follows these steps to set up your tables On the settings page, click on the table management tab on the navigation panel This opens a ...How to Create WebPos Orders
What is the WebPOS WebPOS is used to create orders on behalf of your customers. These can be WhatsApp or call-in orders. Creating orders here allows the customer to follow the order progress through the text they receive at the different stages of ...How to Create Access Level
The ‘Team Roles’ page displays all Roles created in a tabular form with columns showing the details of each role. The details visible are: Name: What you call the role Status: It can either be enabled or disabled. Edit: It allows you make adjustments ...